If you use ThriveCart and ThriveCart Learn and would like to build a funnel that offers a free mini course as the opt-in in the first step, you can of course use a free product in ThriveCart. You just need to set the price to zero, build a checkout for it, and in the fulfillment set it up so it adds the students to a course in ThriveCart Learn.
But as soon as you add an upsell to the funnel in ThriveCart, it requires customers to add their payment details while signing up for the free product, so the one-click upsell can work. Since needing to add their payment details for a free product may seem like a scam to customers and stop them from going through with signing up, we need a different solution.
Instead, here is how you can set it up:
- A landing page with an opt-in that adds customers to your email newsletter system
- A thank-you page that has a ThriveCart checkout for the paid upsell
- And a way for the people who subscribed to that free opt-in to be enrolled in ThriveCart Learn
Why does this need a tutorial?
If you have ever looked into sending your newsletter subscribers from your email marketing tool to ThriveCart Learn, you may have discovered that ThriveCart’s native integrations with MailerLite, ConvertKit, ActiveCampaign, Ontraport, MailChimp, AWeber, Drip, GetResponse etc. may be plentiful, but they only go from ThriveCart to the email marketing tool and not the other way around.
If you have then looked into Zapier to do this for you, you may have discovered that while Zaps from ThriveCart to other systems are easy to set up, Zaps into ThriveCart are still in beta, and using an API request that needs to be manually coded.
Like me, you may have had no idea what to do with the ThriveCart API documentation page, so because I don’t want you to be scratching your head like I was, here is a tutorial on how to make it all happen.
The Funnel Setup
In this process, I will be going in the order of how this is easiest to set up, not in the order of how the student will experience the sign-up.
As my example for this tutorial, I will be using a setup I did for my client Suzanne Culberg, who offers a free course bundle called “Building Boundaries Bundle” (or BBB for short) to conference attendees. She uses ActiveCampaign as her email marketing tool and landing pages built with Elementor Pro on WordPress.
But of course, you can use whatever tools you already use and like, as long as…
- your email marketing tool integrates with Zapier
- your email marketing tool has a way to group subscribers, such as tags, groups, lists, etc. that can be used as a Zapier trigger
- your opt-in form can redirect subscribers to a thank you page
1. Get your email marketing system ready
Go into your email marketing system of choice and create whatever tag, group, segment, list, audience, etc. you are using to denote that a subscriber has signed up for your course. In my example, we are using Active Campaign and tags, so I go to Contacts > Tags and add a new one called “BBB – free”.
Ideally, I would recommend adding your own email address to this grouping too, just so that later you can test the Zapier Zap with your own email address. So in my example case, I added the tag “BBB – free” to my own contact.
Optionally, you can now also create an automation with a welcome email or sequence. I would recommend that in that first email, you tell your students that they will receive a separate email with the login details. You can get the subject line of that email later in testing and come back to edit your welcome email.
1. Get ThriveCart ready
In this step, you should…
- Set up your free course in ThriveCart Learn that your students should be added to
- Set up a paid product for the upsell. Important is that you create it as a normal product, not as an upsell.
For the checkout design of it, you can either create an embeddable checkout or you can create a checkout that already looks like a thank-you page that also has the upsell offer checkout on it. - Make sure you have the delivery of the upsell set up – either as a digital download or also as a ThriveCart Learn course.
2. Create your thank-you page & get the URL
This thank-you page is what will be shown to people who sign up for the free course after they submit the sign-up form.
If you set up your upsell checkout as a thank-you page, then you’re ready to go and just need to get the URL.
If you’re like me (& Suzanne) and you’re setting up a page on a website for this, then you would now create a page and embed the upsell checkout on it.
1. Create a landing page with a free newsletter opt-in for your course
The very first step of your funnel that your customers will see, is a landing page with a newsletter opt-in form. This form should add your customers to your email marketing system and mark them as having signed up for this course. In theory, you can do this any way you prefer, using the landing page system you like, even just landing pages offered by your email marketing provider.
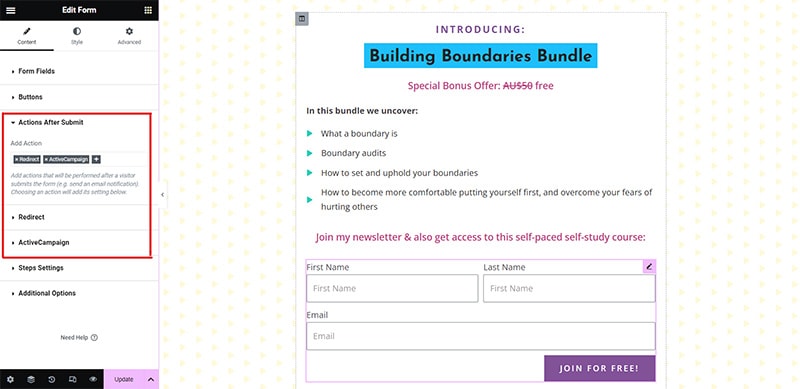
In my example of Suzanne’s setup, I am using a landing page on a WordPress website that is built using the Elementor Pro visual builder. On that page, I have an Elementor form module that has the “Actions After Submit” set up to…
- redirect to another page and
- send the filled-in subscriber info to ActiveCampaign, making sure the fields are matched up and the subscriber is tagged for this freebie
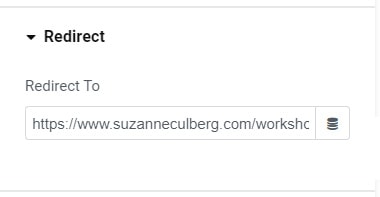
Redirect to the thank you page
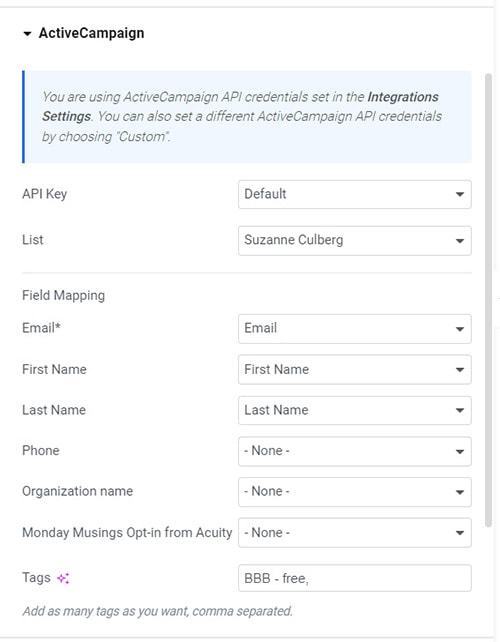
Sending subscribers to ActiveCampaign & tagging them
2. Set up a Zapier Zap that enrolls your newsletter subscriber to a ThriveCart Learn course
We will now go into Zapier and set up a new Zap that connects your email marketing system to ThriveCart.
1. Trigger
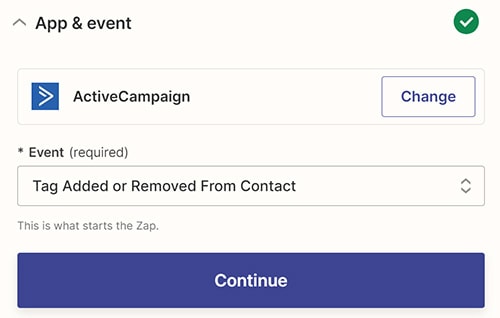
App & Event
App: Select your email marketing system. In my example this is ActiveCampaign.
Event: A subscriber/contact being added to whatever your email marketing system uses to group subscribers: tag, group, list, segment, etc – or the other way around.
In my example, that is “Tag Added or Removed from Contact”
Account
Connect your account or select an existing one
Trigger
These fields will depend on your email marketing system and their API. But it will still be structured similarly.
Event: A subscriber/contact being added to whatever grouping you set up earlier.
In my case, this is “Tag Added to Contact”
Tag/group/list/segment: select the name of the grouping you set up earlier. In my example that is “BBB – free”

Test
Zapier will now pull in test data to make it easier to match up data. This will be a contact/subscriber that already matches the event you set up, so if you added yourself earlier when you got your email marketing system ready to go, then this should be your own data.
2. Action
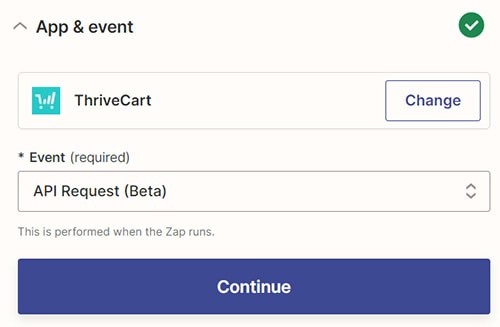
App & Event
App: Select ThriveCart
Event: API Request (Beta)
Account
Connect or select your ThriveCart account.
Action
This is where you will need to manually fill in the fields. I have listed the values that you need to add below, so you can easily copy and paste them. Make sure that in the body section, you replace the placeholders with data from your email marketing system and with your course ID.
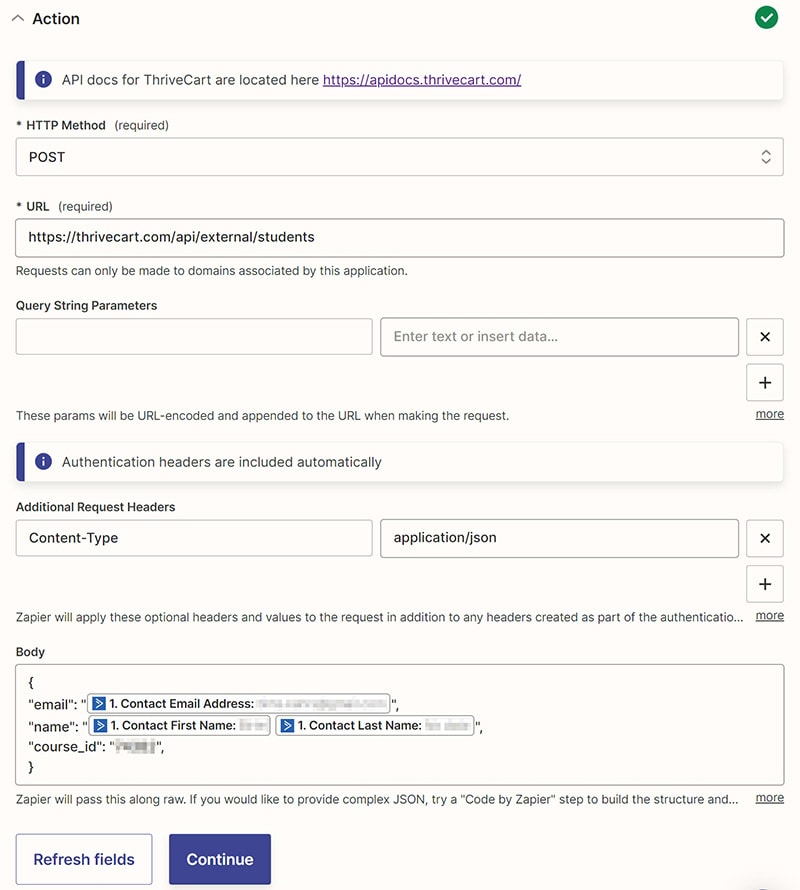
HTTP Method: POST
URL:
https://thrivecart.com/api/external/studentsQuery String Parameters: leave empty
Additional Request Headers:
Content-Typeapplication/json
Body:
{
"email": "[STUDENT EMAIL]",
"name": "[STUDENT NAME]",
"course_id": "[THRIVECART COURSE ID]",
}
Replace the placeholders [STUDENT EMAIL] and [STUDENT NAME] with values from the “Insert Data” drop-down that appears when you click into the body field.
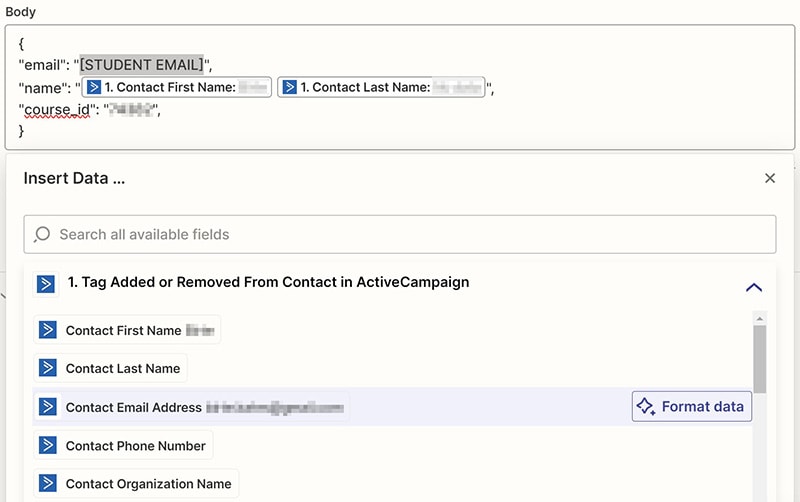
Replace [THRIVECART COURSE ID] with the ID number of your course. You can find this ID by going into ThriveCart Learn and clicking “Edit” on your course. It will be the string of numbers at the end of your URL.

Test
You can now test your Zap and I would highly recommend doing so, so you can make sure it works as intended and so you know how the email looks like that your students will receive from ThriveCart. It means you can put the subject line into your welcome email and on your thank-you page.
However, I would only recommend testing this with test data that uses your own email address, as it will send an email to the student with their login data.
Final Words
Please be aware that…
- you need to set this up again for every new free course you would like to offer with this setup
- if you change the name of your way to group things in your email marketing system, that means you need to also change it in your opt-in form and in the Zap. Otherwise, the Zap won’t be triggered.
Do you need help with this?
You can hire me to do this for you! If you need me to just trouble-shoot, then you can book a call with me here. If you want me to build th